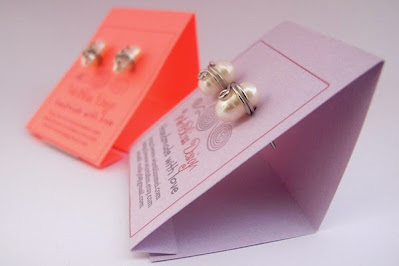
Was thinking if I keep doing this (the procrastinating part - I do this a lot!), it will never going to happen. The other day I got a bunch of order for stud earrings (post about them later) and decided to create this earring cards once and for all. It is not final as I am forever changing the layout and design in my head but good enough for now.
What do you think of my DIY Earring Cards?
 |
| WireBliss logo in front together with websites and email address. The white patch at the center of the purple card is double sided tape. You can use stapler as well. |
Here is the process involved.
I use Microsoft Word to create my cards as I am most familiar with it - use it everyday!
I use Microsoft Word to create my cards as I am most familiar with it - use it everyday!
Alternatively, you can also use Power Point, Excel, Google doc, etc. etc. whichever you are familiar with.
So, here goes:
- Create an image/design (jpeg file or any picture file) that you'd like to place at the front of your earring card. If you don't have one, you can leave it blank - which means you can skip this step.
- Since I have my logo in jpeg, I use that and added my website address below it.
- In a new Word document, create a table (or insert table).
- If you do not know how to create table in Word, google or check it out here - create table
- Depending on the card size you want, determine the number of column for the table.
- Mine is 5 columns and 4 rows (1 column x 4 rows represent 1 card). The purpose of multiple rows is for ease of adjusting the height.
- In the table, place the cursor at the spot where you would like to insert the image. Click on insert image, and look for the image you'd like to insert.
- Make adjustment to the column width and row height till you have your desired earring card size, print it out on a piece of thick paper (100 gm).
- I make the table borders visible so that I know where to cut and fold later on.
- Cut the cards along the borders as shown below.
- Use a needle to make 2 holes on each card and you are done.
If you have other ways of making earring cards, do share or leave me a comment.


No comments:
Post a Comment
I like to hear what you have in mind. Thank you for your time.