Showing posts with label Bracelets | Cuff. Show all posts

Friday, October 03, 2014

Minlet - Pearl for Wisdom

William's requested for this Minlet.
A farewell gift for his Class Teacher who is retiring this week.
He passed it to her this morning but not sure about her reaction to this gift.
I hope she likes it.

Pearl is for Wisdom and I think all teachers are full of wisdom.
Their contribution to us and our children are priceless.
And this little gift is how he shows his appreciation to his teacher.

Material:
  • Stainless steel chain link and lobster claw clasp (non-tarnish, easy to clean and long lasting).
  • Pearl - 6mm.
  • Length - about 7 inches (18 cm). 
  • Adjustable to 8 inches as I added 6 jump rings.
Wire Wrapped Minlet (Minima Bracelet) with pearl

Close up of wire wrapped minima bracelet (Minlet) with pearl - Wisdom

Close up of wire wrapped minima bracelet (Minlet) with pearl - Wisdom

Close up of wire wrapped pearl charm and clasp for minima bracelet (Minlet) with pearl - Wisdom

Tuesday, September 23, 2014

Minlet with Garnet, Amethyst and Swarovski Crystals - Yours Truly

Well this Minlet belongs to me, Yours Truly. Been wearing it for many months now.

One of the first, before I even call them Minlet. A bit of variation where Garnet (my birthstone :)) and Amethyst beads is wire wrapped close to the clasp.
Wire wrapped Minima Bracelet (Minlet) with Garnet, Swarovski Crystal & Amethyst

Close up of Wire wrapped Minima Bracelet (Minlet) with Garnet, Swarovski Crystal & Amethyst

Wire wrapped Minima Bracelet (Minlet) with Garnet, Swarovski Crystal & Amethyst on the wrist

Wire wrapped Minima Bracelet (Minlet) with Garnet, Swarovski Crystal & Amethyst on the wrist

Wednesday, July 02, 2014

Back to Jewelry, Some Sparkly SC Bracelets

For the last few weeks I have not been very productive with my wire jewelry. There are few project ideas in the head but somehow time is not on my side, as usual 
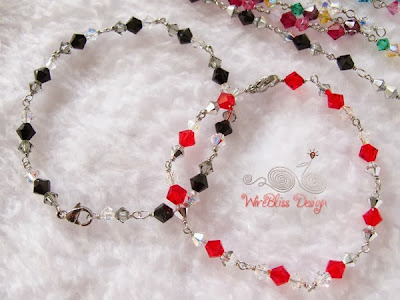
Completed several commissioned pieces. Here's one of them - wire wrapped Swarovski Crystal bracelets. All of them wire wrapped with gold filled wire. Look simple enough but took me about 45 minutes to complete each.
That's roughly about 15 hours of work.
Wire wrapped swarovski crystal bracelet with gold filled wire

Wire wrapped swarovski crystal bracelet with gold filled wire

Wire wrapped Swarovski Crystal bracelet with gold filled wire

Associate link - hover your mouse over the picture below.
A book by Deryn Mentock.


Then, there is the wire wrapped stud earrings.
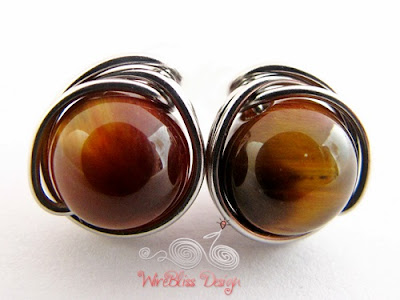
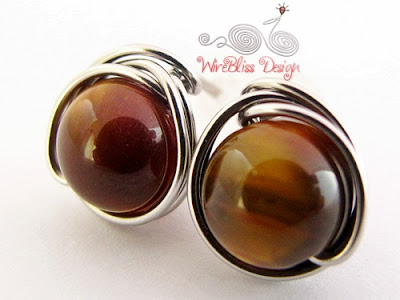
This time around is a tiger eye.
Wire wrapped tiger eye studs by WireBliss

Wire wrapped tiger eye studs by WireBliss

You can make this yourself.
The step by step tutorial is available at my Etsy shop, click *here* (direct download).

And down here is a book by Abby Hook another fellow wire wrapper.
Hover your mouse over the picture.


Happy wrapping!
Hope to be wire wrapping more in the coming weeks.

Friday, May 16, 2014

Wire Jewelry - Sparkly Swarovski Crystal Bracelets

The last four weeks were craaaazy pack.
Firstly, I was "forced" to attend a two weeks audit training and exam which actually was a 3 weeks program because the one week "off" in between was actually spent compiling the audit report.
My hesitation (that's why felt "forced") about attending the training was because of the "exam" at the end of the training.
I am soooooo terrified of "exam"!!!
In the end, I actually enjoyed the training, learned lots of things and made some friends.

Now, waiting for the exam result - I am hoping for the best.
Also, busy catching up with the last 3 weeks work.
Duh!!

That aside, I hope to embark on more wire jewelry projects this weekend - finishing off commissioned pieces and maybe write a new tutorial....mmmmm.....if I have the time.
Anyway, here's sharing my most recent sparkly Swarovski Crystal (4 mm - yeah tiny) bracelets completed early April but only managed to post now.
All wire wrapped with 24 gauge wire.

Wire Wrapped Swarovski Crystal Bracelets

Wire Wrapped Swarovski Crystal Bracelets

Wire Wrapped Swarovski Crystal Bracelet by WireBliss

Wire Wrapped Swarovski Crystal Bracelet around my wrist

Looks good with lots of them together.
Have a great weekend and happy wrapping.

Friday, January 03, 2014

Wire Jewelry - Pearly Wire Woven Cuff

Hello January 2014!!!
Here is my first post of the year.
A pearly woven wire cuff.

Used lots and lots of 30 gauge wire.
Not easy to keep them align to the shank as sometimes I pulled too hard and other time not hard enough.
It's easier at the start but got difficult towards the center of the cuff where it's wider.
Look at the edges, they are not smooth.
But, there is beauty in imperfection :)

Woven Pearl Cuff/Bangle by WireBliss 2014

Woven Pearl Cuff/Bangle by WireBliss 2014

Woven Pearl Cuff/Bangle by WireBliss 2014

Woven Pearl Cuff/Bangle by WireBliss 2014

Woven Pearl Cuff/Bangle by WireBliss 2014

Woven Pearl Cuff/Bangle by WireBliss 2014

Have a productive January!

Tuesday, December 10, 2013

Wire Craft - Sparkly Crsytal Bracelets

The sparkly season is back.
This time around, its the Wire Wrapped Swarovski Crystal Bracelet.
Although they were wire wrapped with the simple wire loops, it took me about 45 minutes to an hour to complete one bracelet.
Wire size - 26 gauge
Swarovski Crystal - 3mm bicone
Clasp - Lobster clasp
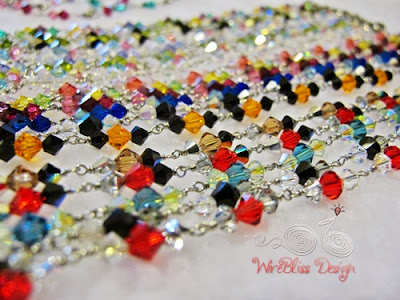
Wire wrapped Swarovski Crystal Bracelets by WireBliss
If you would like to try DIY this sparkly crystal bracelet, there are lots of free online tutorials that teach you how to wire wrap this simple/basic loop.
The most basic tools required - round nose pliers, wire, clasp and a big dose of healthy crafty juice :)
I checked out Pinterest and here are all the available tutorials that you can check out.
Click on the link below and you are on the way to create this sparkly bracelets, just in time for Christmas.
How to Wire Wrap Loops

Close up of Wire wrapped Swarovski Crystal Bracelets by WireBliss

Wire wrapped Swarovski Crystal Bracelets on Wrist by WireBliss
Looks way way nicer if you wear a bunch of them on your wrist.

Wire wrapped Swarovski Crystal Bracelets by WireBliss

Thursday, October 31, 2013

Why are they so Cheap? Too Good to be True

Yeah, I am referring to these silver necklaces and bracelet that I got from Bangkok recently.
I came across them at a small stall, inside a huge mall.
Everything was spread out on the table - necklaces, rings, bracelets, cuff, and each of them priced at a flat rate of 100 Thai Baht. The size and weight does not matter.
They are all 100TB/piece.
Wouldn't you go crazy? :)
I did for a while....hehe.
I just couldn't resist grabbing a few as souvenir and just out of curiosity.
Genuine or not doesn't really matter for that price right?
Closeup of very shiny Chiengmai Silver Wireblissmei
Assuming they are genuine, a piece of similar necklace would have cost around RM100 or more here.
That's about 1000TB.
So, 10 pieces for 1000TB is really very attractive no?

Are they genuine? Judging by the price, its too good to be true/genuine.
Well, honestly I wouldn't know and of course they are silver if you ask the vendor.
He pointed to a piece of paper at the corner that says "Chiangmai Silver".
Mmmm....so its genuine? Nevermind. I grabbed a few anyway.
Very shiny Chiengmai Silver Wireblissmei
Out of curiosity, I googled for Chiangmai Silver but couldn't find anything similar to that I purchased.
Most searched results referred to sites located in Chiangmai.
Very shiny Chiengmai Silver and tarnishing Wireblissmei
They are really shiny though.
They do tarnish after a while as you can see the cuff in the picture above.
No worries about tarnishing as I can clean them up easily.
Check my posting on the easiest and safest way to clean silver here.

If you have any knowledge about Chiang Mai Silver, do enlighten me and my readers here.
You can leave me a comment or contact me with the contact form at the top right of this page.

Tuesday, October 08, 2013

Wire Wrapped Glass Bead Bracelet

These glass beads been with me for ages.
Now they are out there with their new owners.

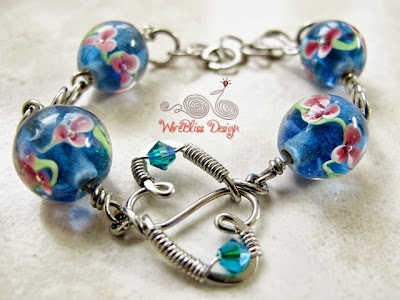
All components of the bracelets except for the glass beads and Swarovsi crystal are handmade.

Both bracelets measure about 7 inches in length but adjustable up to 8 inches.
Extra jump rings added for that purpose.
Wire wrapped glass beads bracelets by Wirebliss
I especially love the wire wrapped double heart focal :))
Wire wrapped glass beads bracelets by Wirebliss

Blue Wire wrapped glass beads bracelet by Wirebliss
Close up of the hearts. Did some hammering there.
Black Wire wrapped glass beads bracelet by Wirebliss

Sunday, September 08, 2013

DIY Tutorial - Stringing your Own Beaded Bracelets and Necklace

As mentioned in the previous post, here is the tutorial on how to make your stringed beaded bracelet or necklace.

You may find this slightly different from what you are used to seeing as I didn't use any crimp bead. Nevertheless, the end result is still the same.

How much time needed?
Allocate about an hour to make 3.
Yeah! A quick and easy project.
Lets get started.....
Materials needed for stringing beads by Wirebliss
Materials:
The above picture shows materials required for 2 bracelets and a necklace.
For each, you will need:
  • Metal string
  • 2 Metal beads
  • 1 Split ring or jump ring
  • 1 Clasps
  • Beads/stones of your choice (number of beads depend on the length of the bracelet and necklace).

  • Insert beads by Wirebliss
    Step 1: Thread all the beads. I thread all at once as I will string each bracelet one after the other. This way also ensure no wastage of your string.

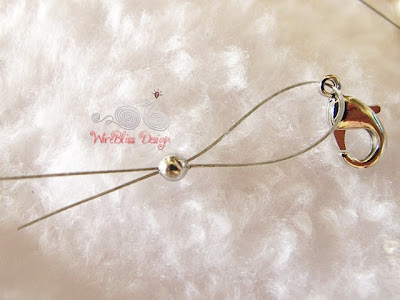
    Insert metal bead and clasp by Wirebliss
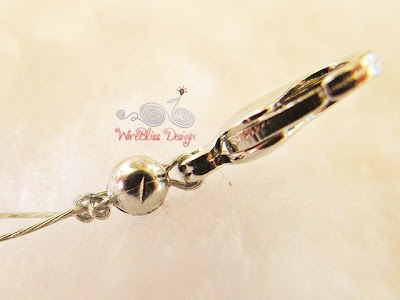
    Step 2: Insert the metal bead followed by the clasp.

    Bring back through metal bead by Wirebliss
    Step 3: Bring the string back through the metal bead.

    Knot the string by Wirebliss
    Step 4: Move the metal bead towards the clasp to tighten and tie a knot close to the metal bead.
    Yeah, a knot instead of crimp.

    Stringed Bracelet - Tia a knot by Wirebliss
    Step 5: Tie another round of knot if you like and cut off excess string.

    Split ring for Bracelet by Wirebliss
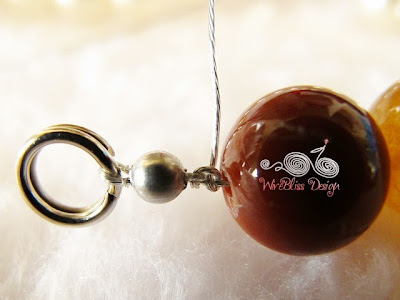
    Step 6: On the other end, insert the metal bead, bring the wire over the split ring and back through the metal bead. Tighten and tie a knot or two.

    Step 7: Cut off excess string and your are done.

    Repeat the above with the next group of beads.

    If you have questions, feel free to add comment or use the contact form at the top right hand side of this page.
    Happy stringing!

    Saturday, August 10, 2013

    DIY Simple Stainless Steel Chain Bracelets

    I said to myself to post more often.
    Said that many many times.
    But.....erm...
    Been weeks since my last post.
    Seems like I can only post during long hols and there are lots of catching up to do. There are few projects completed. Pictures were taken but have not gotten around to edit them yet.
    Will do that in the next few days.

    Here is a simple bracelet project....made for self.
    Just feel like wearing something simple.
    Its a fast and easy project.
    Less than an hour.

    Purchased a stainless steel necklace, pry the links apart (that's the hardest part), wrap the stainless clasps and jump rings.
    tada......got myself 3 simple chain bracelets.
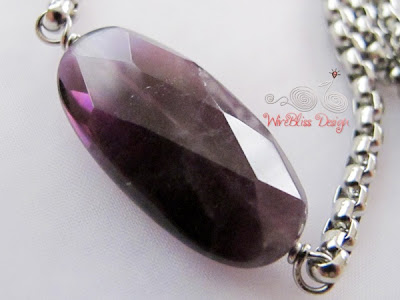
    Added a huge Amethyst to one of them.
    Best thing about them, when I don't want my wrist to be too crowded,
    just take off one or two of them :)
    Stainless Steel Bracelet by Wirebliss
    Stainless Steel Bracelet with Amethyst
    3 Stainless Steel Bracelets by Wirebliss
    Stainless Steel Bracelet by Wirebliss