Showing posts with label Tutorials for Free. Show all posts

Monday, March 21, 2016

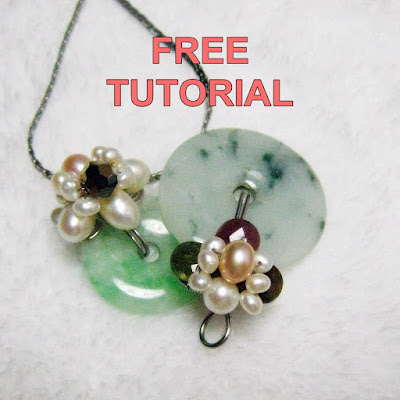
Wire Wrapped Donut Pendant Tutorial is now Free

Update 22 Aug 2020: The free tutorial is no longer available at Craftsy since it was taken over by Bluprint. You still can have it if you email or leave a comment here. I will email it to you. 

Wire Wrapped Donut Pendant Tutorial is retired from my Etsy and Artfire shops.
One of my oldest tutorials.

It’s now available for download (FREE) at my Craftsy Shop, only.
It’s not available at Etsy as there will be relisting fee involves.
Artfire does not have instant download service, so it is not there too.
Only at Crafsy.
To download, click on this link below and it will lead you directly to the tutorial.

Free Wire Wrapped Donut Pendant

Wire Wrapped Donut Pendant Tutorial at WireBliss Craftsy

I hope you'd enjoy this project.
Happy wire wrapping and let me know how it goes.
Leave some pics in Craftsy if you don't mind.

Monday, September 21, 2015

6 Steps Tutorial: Beaded Geometric Earrings

You will need the following for this project are:
  • Wire - about 4 in or 10 cm long
  • 5 Agate Beads, any type - I use 4mm Dyed Agate
  • Earring hooks - there are many types of earring hooks. I use leverback earwire.
  • Wire cutter, round nose pliers or just a normal pliers that can bend wires.
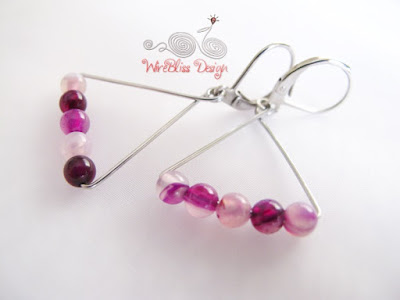
First, have a look at the completed beaded geometric earrings.
Free tutorial for Geometric Earrings by WireBliss

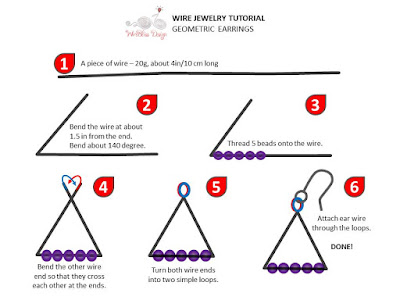
Here is the 6 steps tutorial.
Click on the picture for enlarged view.

Diagram showing step by step to make Beaded Geometric Earrings

Got inspired yet?
I hope you've enjoyed this simple 6 steps geometric earrings tutorial.
You can turn many other geometric shapes into beautiful jewelry.
Just let your imagination lead the way.

6 steps tutorial for Beaded Geometric Earrings with Leverback Earwire

6 steps tutorial for Beaded Geometric Earrings with Leverback Earwire

If you have suggestions, comments or something to say, do leave me a comment.

Thursday, April 10, 2014

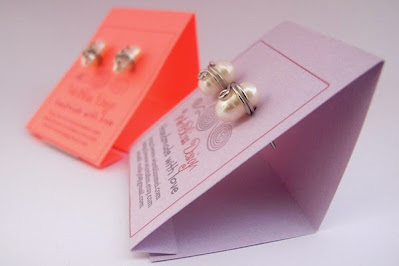
DIY Earring Cards

The idea started long time ago but it didn't materialise until recently. I kind of procrastinated over it and just can't decide on the design. Same as my DIY Light Box previously.

Was thinking if I keep doing this (the procrastinating part - I do this a lot!), it will never going to happen. The other day I got a bunch of order for stud earrings (post about them later) and decided to create this earring cards once and for all. It is not final as I am forever changing the layout and design in my head but good enough for now.

What do you think of my DIY Earring Cards?
DIY Earring Cards by WireBliss
WireBliss logo in front together with websites and email address.
The white patch at the center of the purple card is double sided tape.
You can use stapler as well.
Here is the process involved.
I use Microsoft Word to create my cards as I am most familiar with it - use it everyday!
Alternatively, you can also use Power Point, Excel, Google doc, etc. etc. whichever you are familiar with. 
So, here goes:
  • Create an image/design (jpeg file or any picture file) that you'd like to place at the front of your earring card. If you don't have one, you can leave it blank - which means you can skip this step.
  • Since I have my logo in jpeg, I use that and added my website address below it.
  • In a new Word document, create a table (or insert table). 
  • If you do not know how to create table in Word, google or check it out here - create table 
  • Depending on the card size you want, determine the number of column for the table. 
  • Mine is 5 columns and 4 rows (1 column x 4 rows represent 1 card). The purpose of multiple rows is for ease of adjusting the height.
  • In the table, place the cursor at the spot where you would like to insert the image. Click on insert image, and look for the image you'd like to insert.
  • Make adjustment to the column width and row height till you have your desired earring card size, print it out on a piece of thick paper (100 gm).
  • I make the table borders visible so that I know where to cut and fold later on.
  • Cut the cards along the borders as shown below.
  • Use a needle to make 2 holes on each card and you are done.
Here is how my earring cards looks like + the measurement just to give you the idea - click on the pic to enlarge.
If you have other ways of making earring cards, do share or leave me a comment.
If you have suggestions or questions, do email or leave your comment here too.
DIY Earring Cards by WireBliss


DIY Earring Cards by WireBliss
Side view
That's all for today.

Saturday, April 05, 2014

DIY Light Box (Easy)

I finally decided to make my own light box.
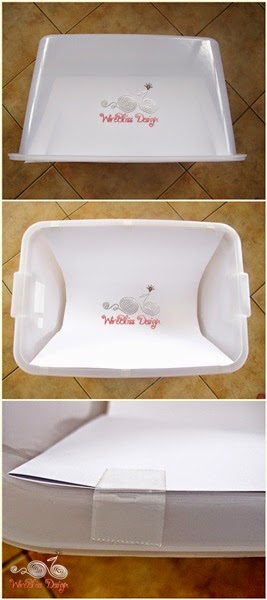
A very simple light box and you only need these three material:
  • A rectangular white plastic storage container which is available at the supermarket. This one cost me RM40.
  • A piece of A2 white paper (thats 8 times the size of A4 paper) folded into half and
  • Sellotape
This is how my light box look like.
DIY Light Box with Plastic Storage Container by WireBliss
It is very easy to set up really.

DIY Light Box with Plastic Storage Container by WireBliss
Side view
DIY Light Box with Plastic Storage Container by WireBliss - taking picture
Tried it out under natural light in the kitchen
Wire wrapped Swarovski Crystal Bracelets
and here is the result - unedited except added the water mark.
Not bad yeah?
The picture is brighter on the top left compared to the bottom right though.
Will do better next time.
After all the light box is very mobile and light.
Hope you are inspired to make your own light box and have a great weekend :)

Sunday, September 08, 2013

DIY Tutorial - Stringing your Own Beaded Bracelets and Necklace

As mentioned in the previous post, here is the tutorial on how to make your stringed beaded bracelet or necklace.

You may find this slightly different from what you are used to seeing as I didn't use any crimp bead. Nevertheless, the end result is still the same.

How much time needed?
Allocate about an hour to make 3.
Yeah! A quick and easy project.
Lets get started.....
Materials needed for stringing beads by Wirebliss
Materials:
The above picture shows materials required for 2 bracelets and a necklace.
For each, you will need:
  • Metal string
  • 2 Metal beads
  • 1 Split ring or jump ring
  • 1 Clasps
  • Beads/stones of your choice (number of beads depend on the length of the bracelet and necklace).

  • Insert beads by Wirebliss
    Step 1: Thread all the beads. I thread all at once as I will string each bracelet one after the other. This way also ensure no wastage of your string.

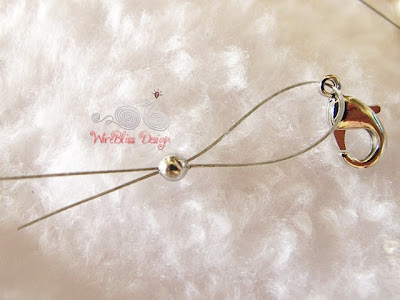
    Insert metal bead and clasp by Wirebliss
    Step 2: Insert the metal bead followed by the clasp.

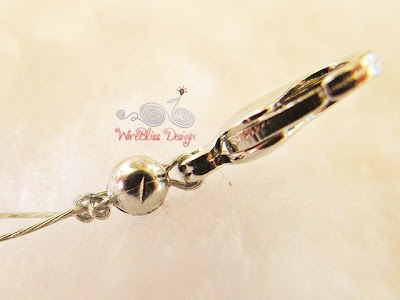
    Bring back through metal bead by Wirebliss
    Step 3: Bring the string back through the metal bead.

    Knot the string by Wirebliss
    Step 4: Move the metal bead towards the clasp to tighten and tie a knot close to the metal bead.
    Yeah, a knot instead of crimp.

    Stringed Bracelet - Tia a knot by Wirebliss
    Step 5: Tie another round of knot if you like and cut off excess string.

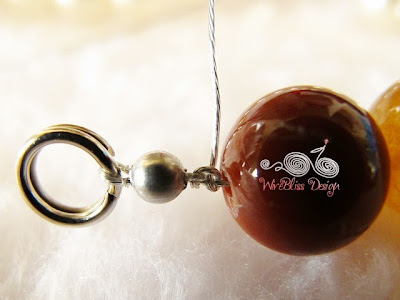
    Split ring for Bracelet by Wirebliss
    Step 6: On the other end, insert the metal bead, bring the wire over the split ring and back through the metal bead. Tighten and tie a knot or two.

    Step 7: Cut off excess string and your are done.

    Repeat the above with the next group of beads.

    If you have questions, feel free to add comment or use the contact form at the top right hand side of this page.

    Happy stringing!

    Saturday, November 24, 2012

    Probably the Easiest, Cheapest and Safest Way to Clean Your Silver

    This is a long overdue post.
    Some of the pictures were taken about two years ago.
    Yeah! That looooooong ago.
    Don't ask me why.
    But I am finally sharing with you....jeng! jeng! jeng!.....

    THE EASIEST, CHEAPEST and SAFEST WAY to CLEAN SILVER.
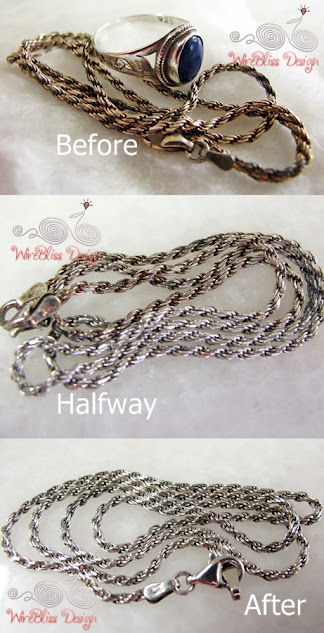
    First thing first, here are the Before and After pictures.
    The WHAT and HOW is further down the post.
    Before and after cleaning the silver ring

    How to clean your silver by Wirebliss - before and after

    Finally, the WHAT?
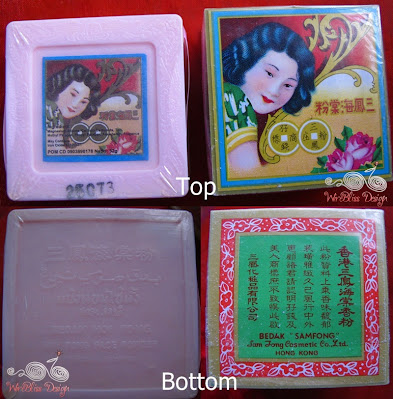
    The SAMFONG POWDER.
    A traditional pressed powder that's been around for decades (maybe century?).
    There are two types shown here, one made in Hong Kong (right) and one made in Indonesia (left, pink).
    If you are on this part of the world, you wouldn't have problem finding this powder.
    Its everywhere - sundry shops to mini markets to supermarkets. Not sure about the mall though.

    Chinese Compact Powder or Sam Fong Hoi Tong Powder - WireBliss

    I don't use it but mom-in-law does.
    Not on her face but for her silver!

    Yes, the secret is out! ha! ha!
    I learn this method of cleaning silver from MIL and she said her mother did the same.
    MIL is in her 70s so that's a long long time ago.

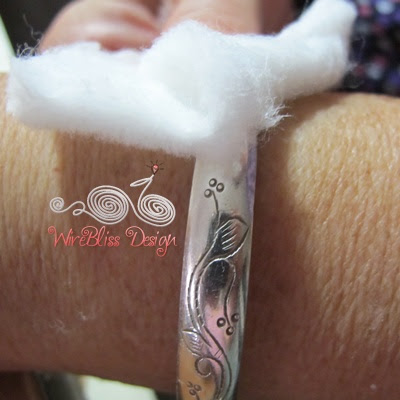
    I snapped this picture while she was cleaning her silver cuff thinking at that time I must blog about this....and here it is, two years later...hahaha
    Cotton is used here.
    Easy peasy!

    Mother in law cleaning her silver cuff - WireBliss

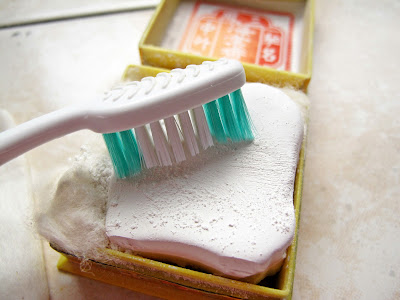
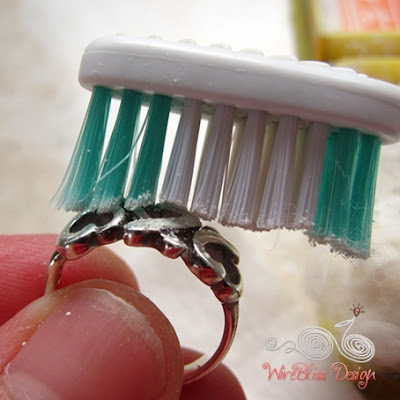
    You can use an old toothbrush too.
    Just scratch some powder on and brush your silver ring or silver jewelry.
    Cleaning silver with toothbrush and Samfong Powder by WireBliss

     Cleaning silver with toothbrush and Samfong Powder by WireBliss

     Cleaning silver with toothbrush and Samfong Powder by WireBliss

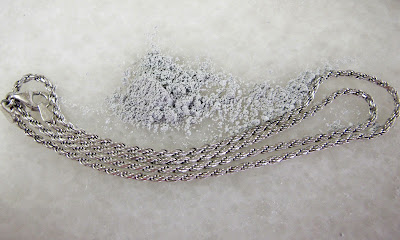
    The powder and the silver chain after cleaning.
    Dirty powder, shiny silver!
    Cleaning silver with toothbrush and Samfong Powder by WireBliss

    Hope you find this post useful.
    Just another cheap and easy alternative to clean your silver jewelries.
    Have a great weekend.
    Happy belated Thanksgiving to readers that are celebrating.

    Wednesday, January 18, 2012

    Can't Comment!

    Arrrrrrgh! I can't reply to comment on my blog.
    Why? Why? Why? Been trying for two days.

    Dear readers, do you have the same experience before?
    How do you solve this?
    I have never experience this before.

    Looks like I have to reply to comment here.
    Hope there is no problem publishing.

    Banae, I hope you are reading this.
    Banae Phelps,  Monday, January 16, 2012 11:35:00 AM GMT+08:00
    What gauge of wire are you utilizing here? I am just starting and thought this would be an easy item to make to learn how to work with the wire and tools before I purchased your other tutorials. THank you.

    Monday, October 19, 2009

    New Tutorial - Heart to Heart Earrings, 30% Discount or Free Tutorial

    "Heart to Heart Earrings Tutorial" is now available at my Etsy Shop for $5.00.
    As a token of appreciation, you can get 30% off this tutorial OR get free tutorial/s from my Low Cost Tutorial Section on Etsy Shop if you do the following. Read on below:


    How to get 30% Off Heart to Heart Tutorial OR Free Low Cost Tutorial
    1. Post about this Heart to Heart Tutorial post on your blog/website/Facebook/Tweeter and link back to this post. I leave it to you to decide on the length of post. 
    E.g. Heart to Heart Earrings Tutorial is now available at Wireblissmei.com. You can get 30% off or opt for a free tutorial if.........Check it out now at wireblissmei.com.....

    2. After posting, please come back here and do either one of this:
    a) Post a comment or
    b) Email me at meiky6@gmail.com, if you want privacy.

        Information to include in your comment or email:
        If you opt for Heart to Heart Earrings Tutorial:
        * URL of your post where the link back is located, so that I can clarify your post and linking.
        * Your email address, so I can email you the invoice for $3.50.

       If you opt for Free Low Cost Tutorial
       * URL to your post/s where the link back is located, so that I can clarify your post and linking.
       * Your email address, so I can email you the low cost tutorial of your choice.
       * Your choice of the Low cost tutorial - Top Wrapped Stud Earrings OR Wire Wrapped Rose Ring

    Disclaimer:
    • The 30% off is valid for Heart to Heart Earrings Tutorial only.
    • Only one entry per person or per post/per blog/per website. If you have two blogs/websites and posted in both, then you can claim for 2 free low cost tutorials that I have. I only have 2 low cost tutorials to offer right now. So, 2 will be the maximum.
    • The discount of 30% for Heart to Heart Tutorial will be given once I have clarified your posting and linking. I will email you a PayPal invoice for $3.50. The tutorial will be emailed to you once payment is approved.
    • Free low cost tutorial will be emailed to you immediately after I clarified your posting and linking.
    • As of now, there is no deadline to this offer.
    • This type of offer may be extended to my other tutorials in future. So, keep posted by subscribing to my RSS Feed - click here or Follow Me (right hand column of this blog). 
    • Due to our different time zone, please allow 24 hours for respond and delivery.
    • Wireblissmei reserve the right to change the terms and conditions.
    Thank you for your interest.
    This kind of offer is my first time so let us learn together and see how it works out.
    I am all for comments and suggestions. 

    That said, if you don't want all the hassle, head on to my Etsy Shop to purchase this tutorial :)
    Have a great week ahead.

    Thursday, June 18, 2009

    I Heard What You Want!

    The poll ended two days ago but I procrastinated in posting them till now. For those who participated in this mini survey, a "BIG Thank You" from me. Now I know what you want, hmm...at least the majority....:D, although only 29 voted. The Wire Wrapped Butterfly Pendant is the most popular judging by the poll result (48%). This is followed by Facing the Cobra Bracelet (24%) and Twice Around the World Bracelet (17%). I better get to work soon...:D WireBlissMei

    Monday, April 27, 2009

    Free Tutorial - Simple Wire Hook Earrings

    I got distracted again! Instead of finishing those in my "to do list", a sudden urge to create a simple hook earrings for myself consumed me yesterday. Since I am in taking picture mood, I took some pictures to show the steps involved in creating this simple pair of wire earrings. Click on the pics for larger view. Do Enjoy! :) and leave me feedback if you have the time.
    Free Tutorial - Simple Wire Hook EarringsNot much, just 2 pieces of 5in wire and beads of your choice. I used 3 beads for each side. The number of beads is up to you. Less beads, less wire :)
    Filing the wire end that will be the ear hooksFile wire ends that will be the ear hooks. You don't want to get your earlobes prick :)
    hammering the wire endHammer flat the other ends. hammered wire endsThis is how they look like after hammering.
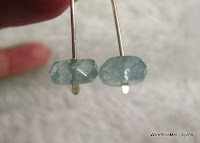
    Insert the beads with the hammered ends acting as stoppersInsert the beads with the hammered ends acting as stoppers.
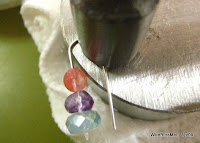
    Forming the hook with round nose pliersForm the hook with round nose pliers.
    Forming the hook with round nose pliersYeah! bend the wire all the way down. This is one big round nose pliers. Found it in hubby's toolbox...LOL...now unofficially mine.
    Forming the hook with round nose pliersAfter bending......
    back to hammering, to harden the hook....back to hammering, to harden the hook....I loooove hammering! Be careful! Don't hammer the beads.
    comparing hammered and non hammered hookCompare the hammered one (left) and un-hammered (is there such a word?) one.
    use flat nose pliers to bend the hook endsWhen done with hammering, use flat nose pliers to bend the hook ends this way. Bend about 0.5cm, about 45 degree.
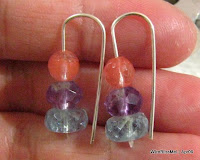
    completed simple hook earringsDone! Here is my simple hook earrings. Easy to put on and take off. Definitely will put on later :D
    WireBlissMei

    Thursday, April 09, 2009

    Wired bird's Nest Tutorials

    Just sharing what fellow artists has recently shared. Someone asked me months back if I have the tutorial for a wired bird's nest pendant. The answer is no but then shortly after that, Cathe Holden of Just Something I Made shared a tutorial on how to make this little cute wired bird nest. Then very recently, Deryn also shared her own bird's nest tutorial (for a small fee). Could it be the spring season that people are making lots of bird's nests? Anyway, both tutorials look great although you may notice some differences in the techniques. I haven't got the time to make them yet but will be soon. If you have the time, check out both sites and get inspired. WireBlissMei

    Saturday, January 17, 2009

    Free Tutorial: Basic 3-Wire Braiding

    This is like a "Commercial Break" for me.
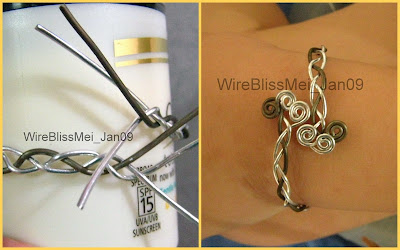
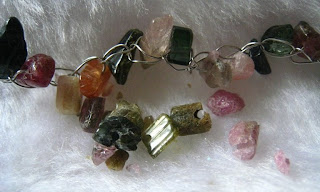
    Do enjoy this Basic 3-wire Braiding Tutorial. It only takes about half an hour or less to finish a simple bracelet with this Basic 3-wire Braid Tutorial. Once done and you are feeling adventurous enough, you may even want to try create something like these| Facing the Cobra II or Meet me Halfway :) HAPPY WRAPPING!
    Note: Read the pictures from left to right.
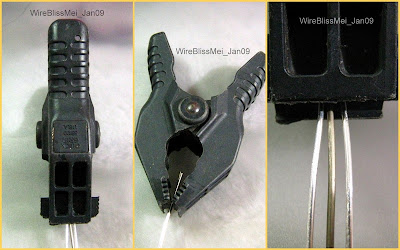
    Basic wire braiding tutorialStep 1| Cut 3 separate wires of about 9 inches each. Step 2| Grip all 3 wires with a quick grip (I used hubby's quick grip here :)).
    Basic wire braiding tutorialStep 3| Take wire 1 on the left over wire 2 in the center. Step 4| Take wire 3 on the right over wire 1 which is now in the center. Step 5| Continue by repeating Steps 3 and 4, keeping the wires as close as possible to each other. Basic wire braiding tutorialStep 6| Stop braiding when you almost reach the end. Leave about and inch to form spirals later. Basic wire braiding tutorialStep 7| Use something round (here I use Oil of Olay Suncreen Lotion bottle) to shape the bracelet. Step 8| Once done, use round nose and flat nose pliers to make tiny spirals of the remaining wire ends. Well done! You made yourself a simple braided bracelet. Are you ready for more? Maybe you can try these out| Facing the Cobra II or Meet me Halfway :) or wait for the tutorials - Coming Soon :)

    Sunday, September 21, 2008

    Wire Crocheted Bracelet - My First

    My customers are wonderful people who always give me new challenges by requesting something that I have never done before. This time around is a request for a tourmaline chips wire crochet bracelet.
    I was quite hesitant to start as I am not very sure if I can make it or not. After all I have very basic crocheting skill. I can only make the loop or what is known as chain stitch. But fortunately, that is all you need to know to make a wire crochet bracelet - make some loops. Oh! don't forget the crochet hook.
    Look at my first attempt with the tourmaline chips. Broke some chips in my first try. They are so brittle. Most likely due to the wire I used, 26g wire which is too thick for crocheting.
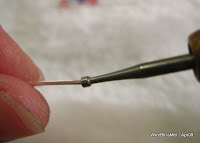
    tourmaline chips wire crochet bracelet
    On my second attempt, I use 28g wire and the result is my first wire crocheted bracelet! Not that difficult after all. Learn to crochet a loop and you will be on your way to many many more wire crochet bracelets, necklaces, etc. etc.
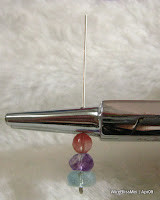
    tourmaline chips wire crochet bracelet
    tourmaline chips wire crochet bracelet tourmaline chips wire crochet bracelet
    If your are interested to learn wire crocheting, here are three sites that provide free wire crochet tutorials that I found online and they are easy to follow:
    You tube - Karla Kam
    Happy trying :)